Onboarding checklists: choosing the items and making them tick themselves
Three to five items, each an action in the product. How to choose them, why an automatic tick beats a checkbox users tick themselves, and where checklists fall short — using the checklist in our own dashboard as the example.
An onboarding checklist is a short list of actions in a corner of the screen with a progress bar. It only works if the items are real steps toward a result and each one is ticked when the step has really been done. Here is how to get there, using the checklist we show new Clew users.
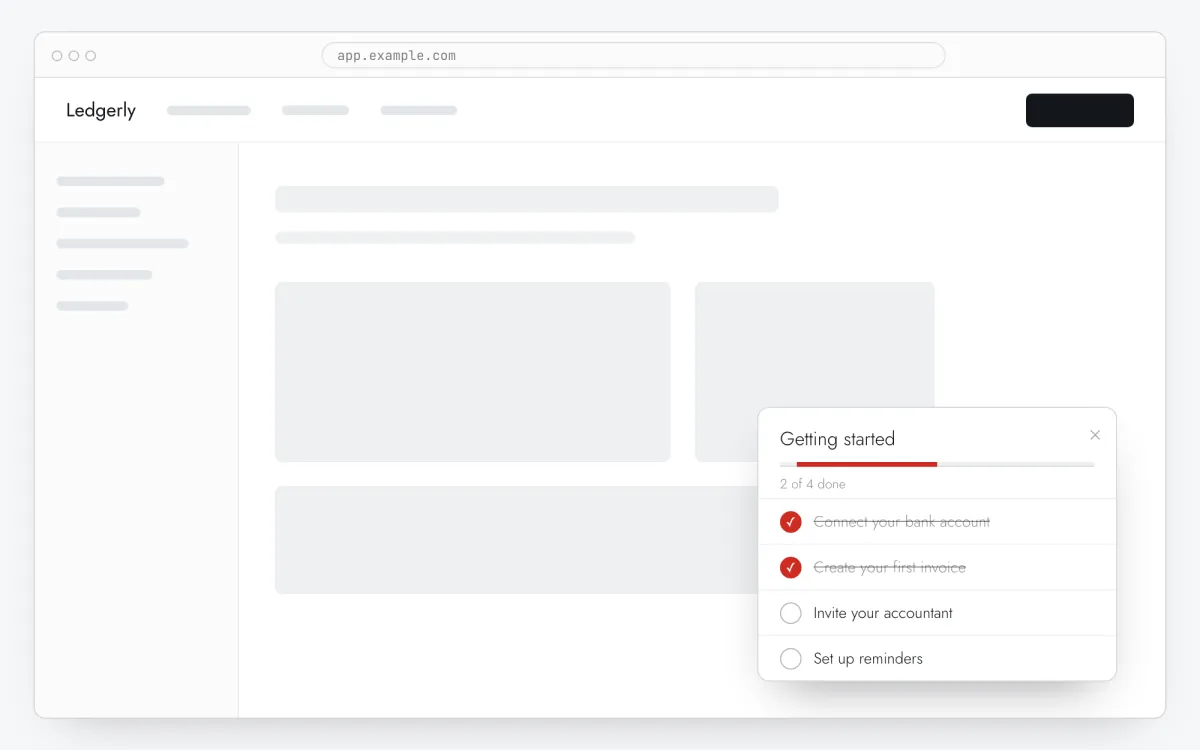
How many items, and in what order
Three to five. Any more and it turns into a to-do list people want to dismiss rather than finish. Keep only what the person needs to reach the result they signed up for.
Order the items along the user’s path, not by how much they matter to you. The first should take a minute — it shows the list can be done. “Read the docs” doesn’t belong: it isn’t an action in the product and can’t be checked.
For an invoicing app that could be: connect a bank account → send a first invoice → invite your accountant. Three items, each a real action, together the path to why the person signed up.
Four ways to tick an item
In Clew each item can have a completion rule. Without one, the item is a plain checkbox.
- Manually. The user clicks the item. If it has a link, the link opens in a new tab.
- By URL. The item ticks when the user lands on a page: exact path, prefix, “contains” or a regular expression. In a single-page app the check runs again after every route change.
- By click. The item ticks when the user clicks an element matching a CSS selector — the Invite button, for example.
- By event. Your code calls
Clew.complete('invited')at the moment the thing actually happened — say, when the server confirmed the invite.
An item with a rule can’t be ticked by hand. The widget labels such items as automatic, so they don’t look like broken checkboxes.
Why we go with events
A manual tick proves only that someone clicked the tick. A click rule proves they clicked the button, not that the action worked — the form might have returned an error. An event from your code ticks the item only when there is a result.
That is why our checklist in the Clew dashboard, “Run your first A/B test”, runs entirely on events:
snippet_copied  →  install snippet copied
widget_live     →  widget sent events from the site
tour_published  →  a tour was published
ab_started      →  an A/B test was switched on
ab_decided      →  the test was ended
If an event fires while the checklist isn’t on screen, the key isn’t lost: the widget keeps it in memory for that page and ticks the item as soon as the checklist appears. The rest of our onboarding is described in how we onboard Clew users with Clew.
How the checklist behaves on screen
- It shows alongside a tour or modal, not instead of them.
- It is open on screens wider than 1024 px and folded into a pill on narrower ones. Once a user opens or folds it themselves, that choice is remembered.
- Progress stays in sync across tabs of the same browser.
- When every item is done, the checklist counts as completed and, with frequency set to once, doesn’t come back.
Limits
- Progress is stored in the browser, not the user account. On another computer the checklist starts over: URL items tick again when the user visits the page, the others don’t.
- Per-item stats (how many people ticked each item) are collected only when the widget’s tracking is on.
- Checklists are available from the Pro plan. Free covers tours and tooltips.