How to set up user onboarding without a developer
Good onboarding is not one long tour. It is a short welcome, a guided first action and a list for the next visit. Clew gives you all three formats in one editor, with rules for who sees what and a funnel that shows where new users stall.
- Time
- ● 40 minutes
- Price
- Tours free · rest 14-day trial
- Format
- Step-by-step tooltips + Modal window + Onboarding checklist
What onboarding in Clew consists of
An onboarding flow in Clew is a few separate items that follow the user’s path:
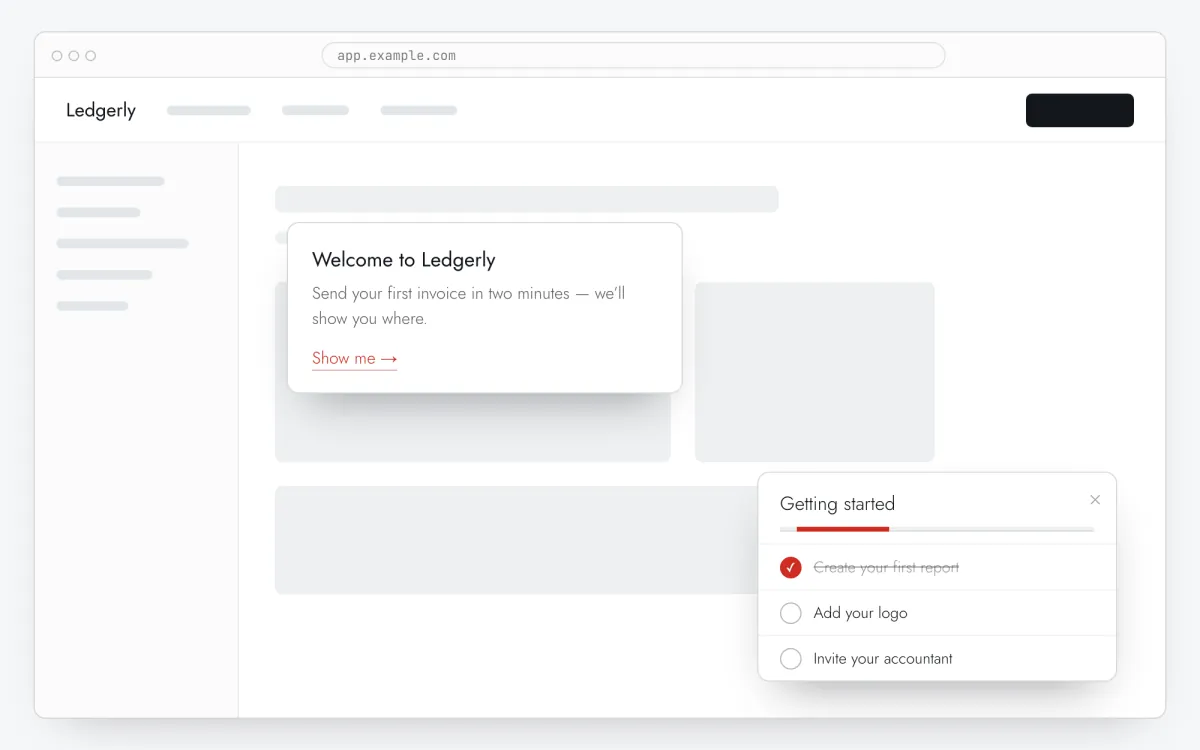
- a welcome popup (Modal window) on the first screen, once per visitor;
- a product tour (Step-by-step tooltips) on the screen where the first result is created — it starts when the user goes there;
- a checklist (Onboarding checklist) from the second visit, with the remaining setup tasks.
Each item has its own URL rule, trigger and audience, so the flow adapts to where the user actually is instead of forcing a 12-step tour on page load.
How to design it
Start from the first result
Write down the single action after which the product is useful. The tour exists only to get people there.
Welcome in one sentence
The popup says what the user will get and sends them to that screen. No feature list.
Leave the rest for later
Invites, integrations, settings go on the checklist that appears on the second visit.
Read the funnel weekly
If most users close the welcome popup, shorten it; if they drop at tour step 2, the screen itself is confusing.
How to build an onboarding flow in 5 steps
- Step 01
Copy your Clew snippet
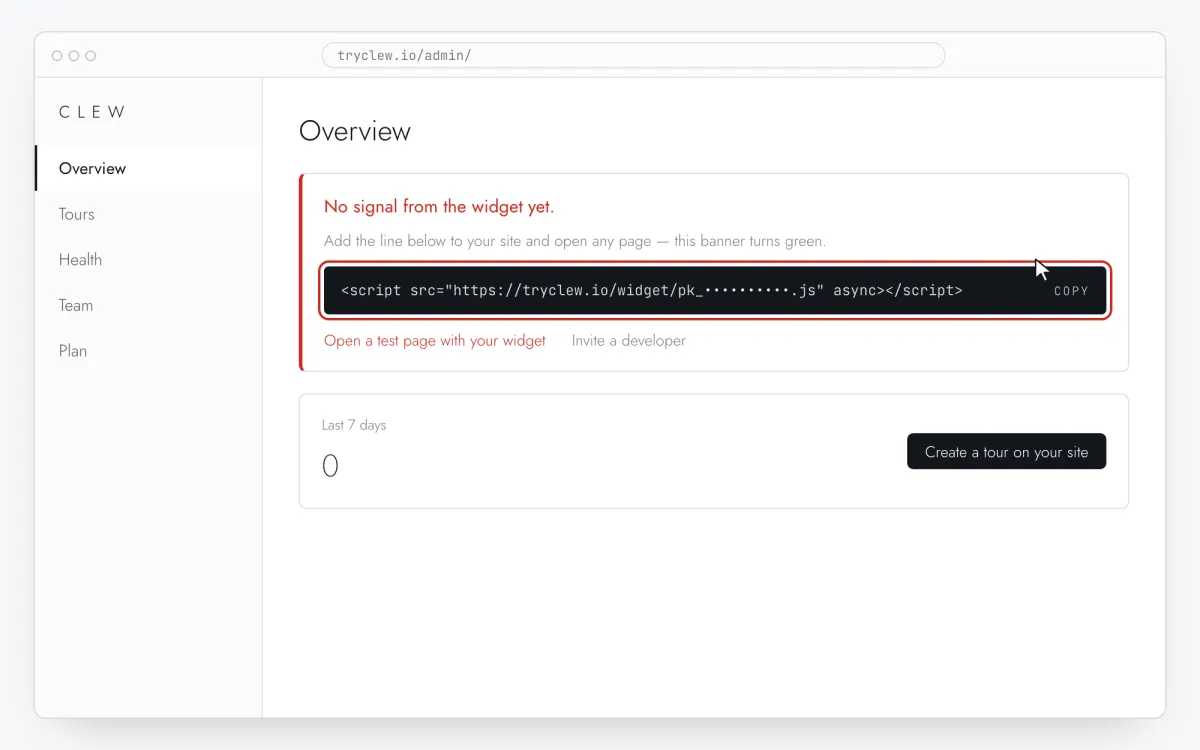
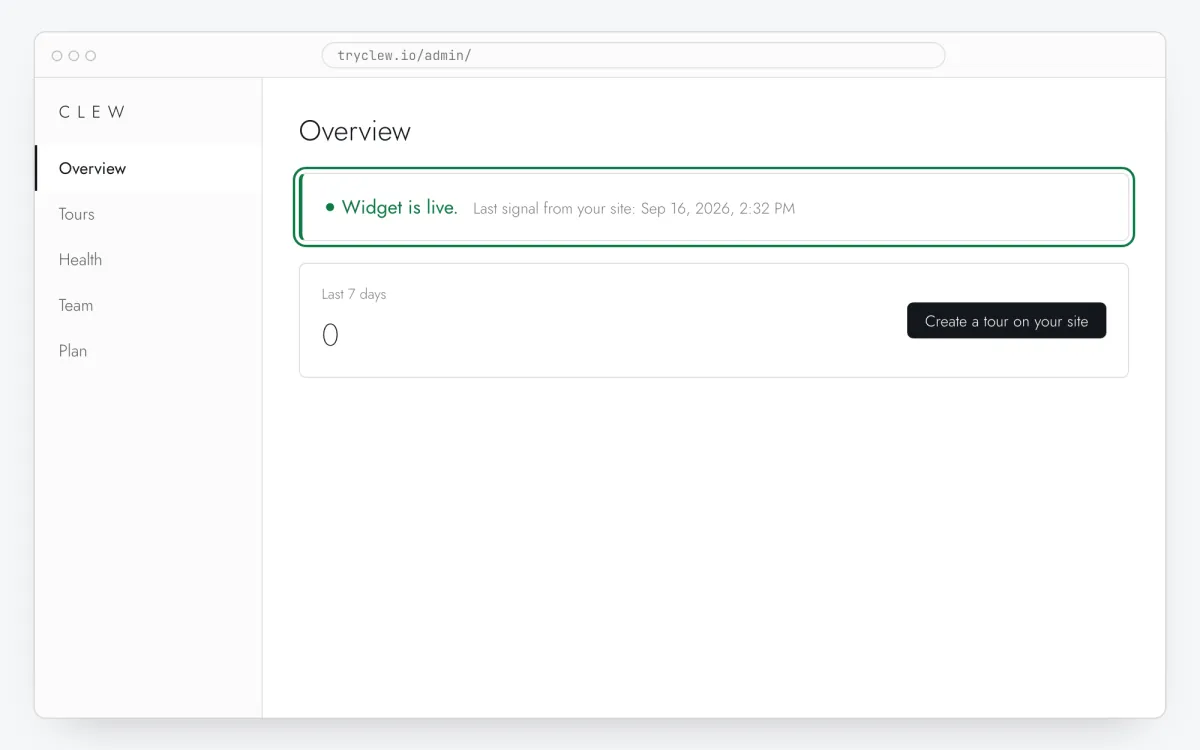
Create a free account (or sign in), add your site and open Admin → Overview. Click the line in the “No signal from the widget yet.” card to copy it — it carries your real site key instead of the placeholder.
<!-- Clew: replace PASTE_YOUR_SITE_KEY with the site key from Admin > Overview -->
<script src="https://tryclew.io/widget/PASTE_YOUR_SITE_KEY.js" async></script>
Step 1 · schematic illustration - Step 02
Add the line to your site once
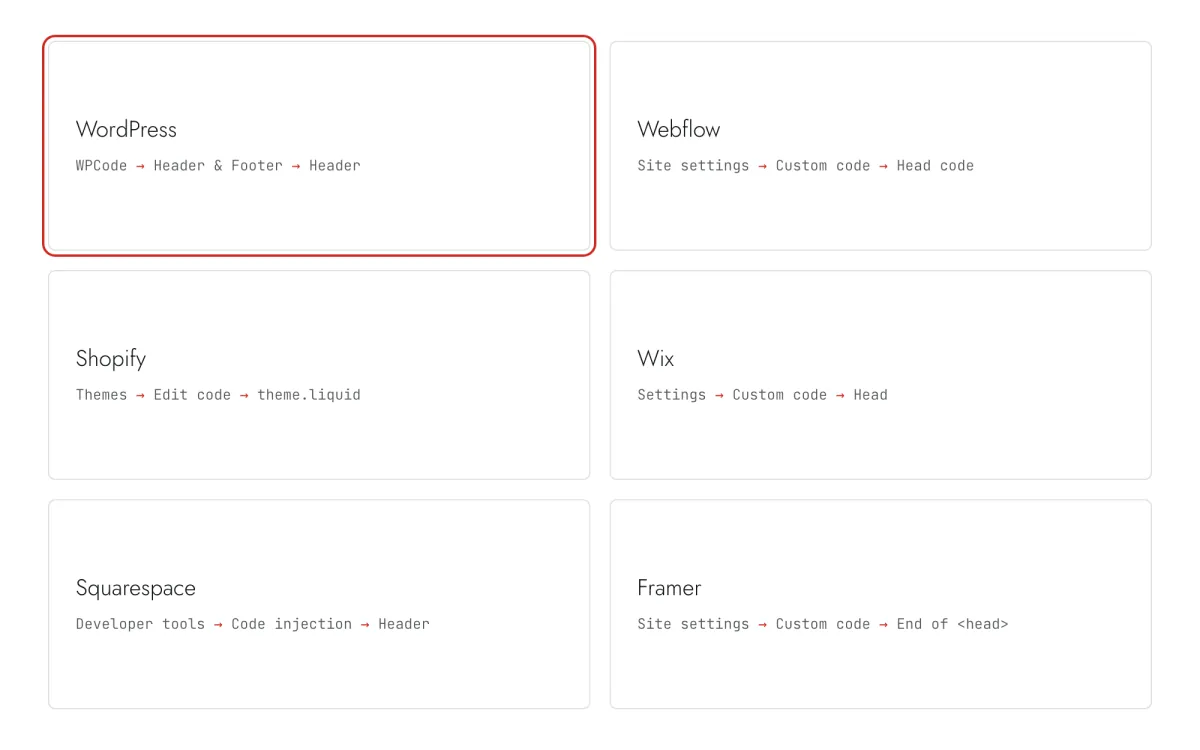
Paste the snippet wherever you manage the site. Each guide takes 5–10 minutes and never has to be repeated: everything else happens in Clew.
Step 2 · schematic illustration - Step 03
Create the three onboarding items
In Clew create three items in Flows: a Modal window with one welcome sentence and a link to the key screen; a Step-by-step tooltips tour of 3–4 steps on that screen, built with Edit on your site and Pick element; and a Onboarding checklist with the remaining setup tasks.
Step 3 · schematic illustration - Step 04
Choose where, when and for whom it shows
In the same editor, set Where to show (page URL), When to show, Audience targeting and Frequency. These are the settings of the example above:
Setting Value Welcome popup Format Modal window Where to show (page URL) Exact path /appWhen to show Right on page load Audience targeting No rules — everyone who opens the page Frequency Once per visitor Product tour Format Step-by-step tooltips Where to show (page URL) Section by prefix /app/projectsWhen to show Right on page load Audience targeting No rules — everyone who opens the page Frequency Once per visitor Checklist Format Onboarding checklist Where to show (page URL) Section by prefix /appWhen to show On the Nth visit: 2 Audience targeting No rules — everyone who opens the page Frequency Once per visitor 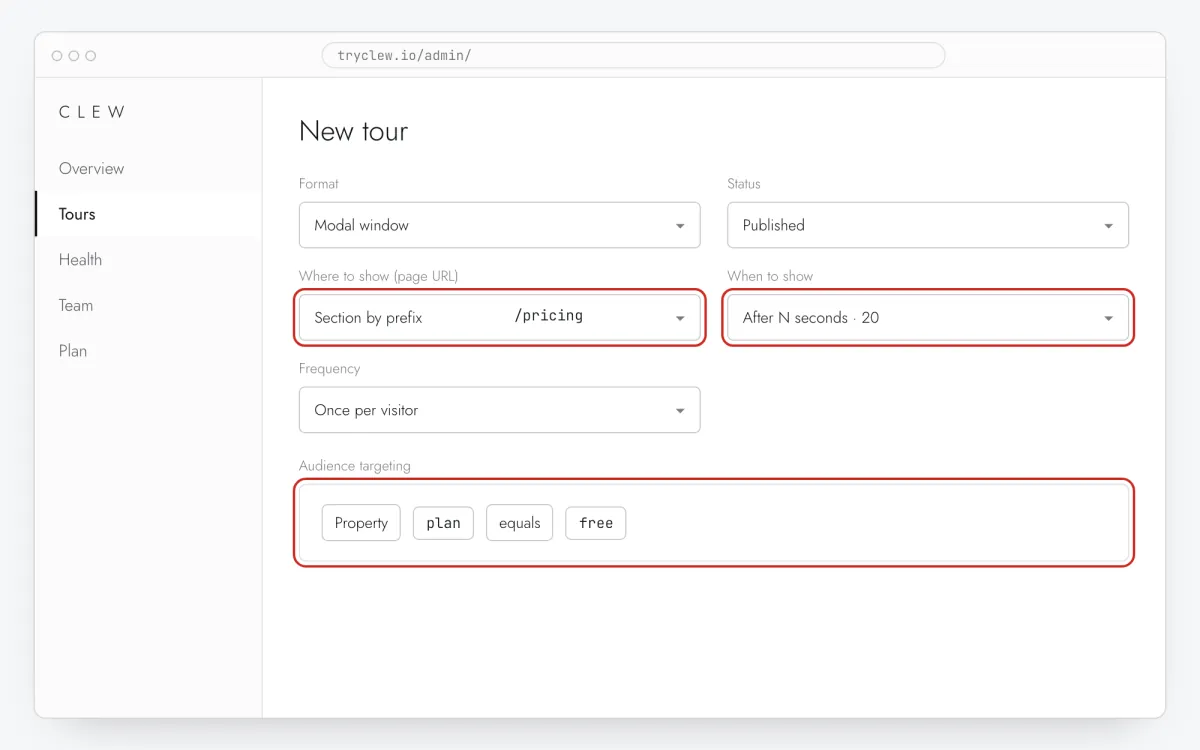
Step 4 · schematic illustration - Step 05
Publish and check it on the live site
Set Status to Published and save. Open the page in a private window — Clew remembers who has already seen a “once” item, so your usual browser may skip it. Views, completions and drop-offs appear in the tour stats.
Step 5 · schematic illustration
Step-by-step: user onboarding on your platform
Pick the platform your site or app is built with. Every guide has the insertion steps, a worked example with ready settings, and the pitfalls of that platform.
Is it free?
The product tour part is free on the Free plan (up to 3 published). The Modal, Checklist and audience rules are part of Pro: every new account gets a 14-day trial with everything included, no card. When the trial ends nothing is deleted and published items keep showing.
Questions and answers
Is it free?
The tour part is free on the Free plan (up to 3 published). The Modal, Checklist and audience rules are in Pro; every new account gets a 14-day trial with everything, no card.
How do I show onboarding only to new users?
Without code: Once per visitor plus pages only new users open. With your app: send a property such as signed_up_at or onboarded via Clew.identify() and add an audience rule.
Can the items run in a sequence?
They follow the user’s navigation: the welcome popup on the first screen, the tour when they open the next one, the checklist on a later visit. One item is on screen at a time.
How is this different from a product tour?
A tour is one format. Onboarding is the whole first-session path, of which a tour is usually the middle part.